OVERVIEW
This application note defines the required configuration parameters for configuring the CONVERGE Pro 2 (CP2) to register with the Cisco Unified Communications Manager (UCM). It identifies the necessary information needed to correctly configure a CP2 to register and operate on UCM. The examples used in this document are from UCM 11.5 and CONVERGE Pro 2 CONSOLE application.
NOTE: This document applies to CP2 models with VoIP capability, including 128V, 128VD, and 48V.
CISCO CALLMANAGER SETUP
To set up two lines with two calls each (which allows you to make three-way calls), create a Third Party SIP Device (Basic) endpoint for the CP2. To set up two lines with up to five-party calls for each line, create a Third Party SIP Device (Advanced) endpoint.
Ensure the User has Digest Credentials set, and record these for use in the CP2 CONSOLE. If needed, refer to Cisco documentation on how to set up this type of extension. Cisco has a very helpful checklist here:
NOTE: As new versions of this document are released, it’s possible that this URL may no longer be valid. If so, you can search for “cisco x configure third party sip phones”, where x is the UCM version.
CONFIGURE UCM
To configure UCM for use with CP2, there are four steps you must complete:
• Create an end user
• Create a third-party device (Basic for 2 calls per line; Advanced for 5 calls per line)
• Create an extension/Directory Number (DN) for each line
• Associate the third-party device with the end user
Create End User
1. Go to User Management > End User.
The End User Configuration dialog box appears:
2. Add the Digest Credentials in the End User Configuration dialog box.
NOTE: If you have retrieved the user information from Active Directory, other information may be included on this screen, but only the Digest Credentials are required.
3. Click Save.
Create Third Party Device (Basic)
NOTE: The Third Party Device (Basic) lets you configure up to 2 calls per line, which permits three-way conference calls. To use up to five calls per line, skip to the Create Third Party Device (Advanced) section below.
4. Go to Device > Phones and click Add New Phone.
The Phone Configuration dialog box appears:


5. For phone type, choose Third-party SIP Device (Basic).
6. Be sure to enter the MAC address of the CP2 in the MAC Address field.
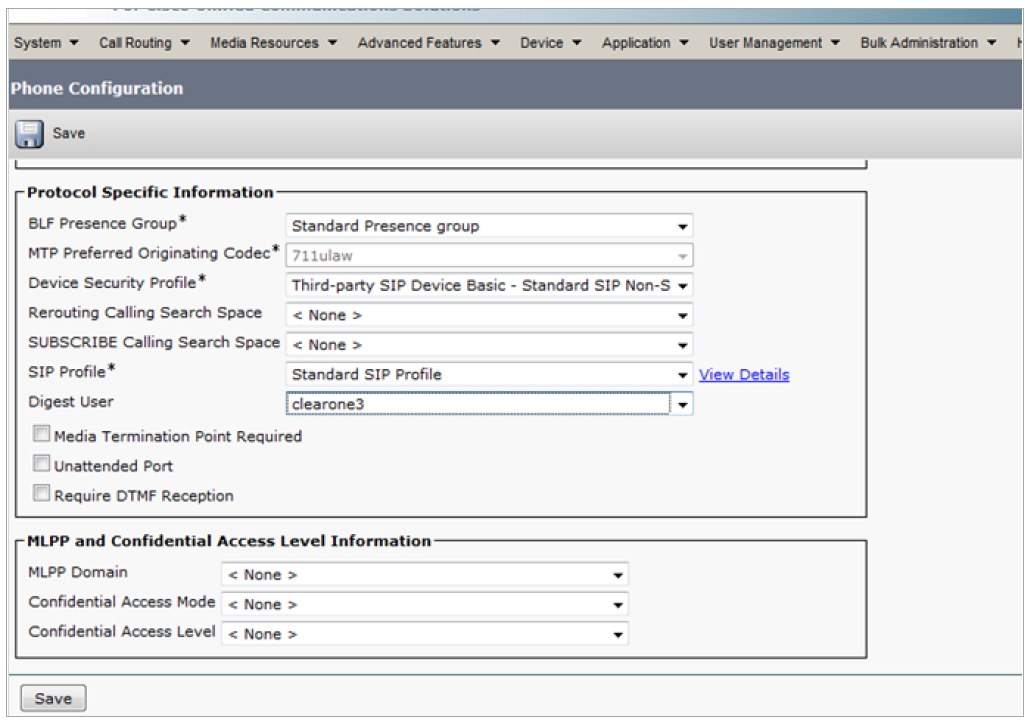
7. Scroll down to Protocol Specific Information and fill it in as shown below:
8. Click Save.
9. Go to Association Information and add your directory number.
10. Skip to the Associate Third Party Phone with End User section below.
Create Third Party Device (Advanced)
NOTE: The Third Party Device (Advanced) lets you configure up to 5 calls per line.
11. Go to Device > Phones and click Add New Phone.
The Phone Configuration dialog box appears:
12. For phone type, choose Third-party SIP Device (Advanced).
13. Scroll down to Protocol Specific Information and fill it in as shown below:

14. Be sure to enter the MAC address of the CP2 in the MAC Address field.
15. Go to Association Information and add your directory number.
16. In the Directory Number Configuration screen, scroll down to the Multiple Call/Call Waiting Settings section and set the Maximum Number of Calls and Busy Trigger to a number up to 5:

17. Click Save.
Associate Third-party Phone with End User
18. Go to User Management > End User > Find/Search.
19. Search for the user you created earlier in step 2.
20. Once you have found the user, select that user and click Open.
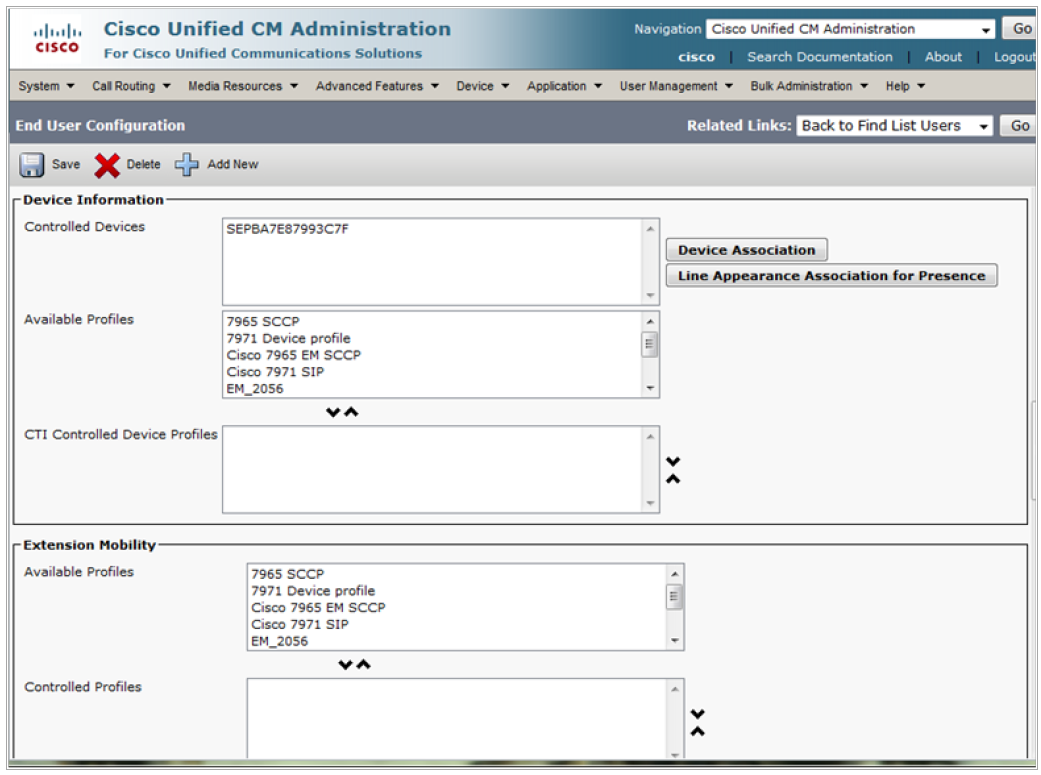
21. Scroll down the page until you locate the Device Information section:

22. Click the Device Association button.
23. Select the user DN to be associated with the End User as shown below:

Once the Third-party Device is associated the phone will be listed under the Controlled Devices as shown here:
CONFIGURE CONVERGE PRO 2 CONSOLE
Log in to the CP2 with the CONSOLE application. For detailed information on how to use the CONVERGE Pro 2
CONSOLE application, consult the CONVERGE Pro 2 CONSOLE User Manual found at:
https://www.clearone.com/sites/default/files/2019-05/CP2_CONSOLE_User_Manual.pdf
1. In the CONSOLE application, from the Navigation Panel (the options at the left of the interface), under Stack, choose Devices.
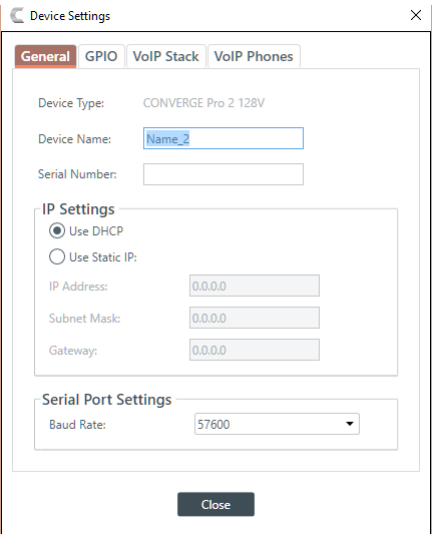
2. Click Settings.
The Device Settings dialog box appears:
3. Click the VoIP Phones tab.
The VoIP Phones dialog box appears:
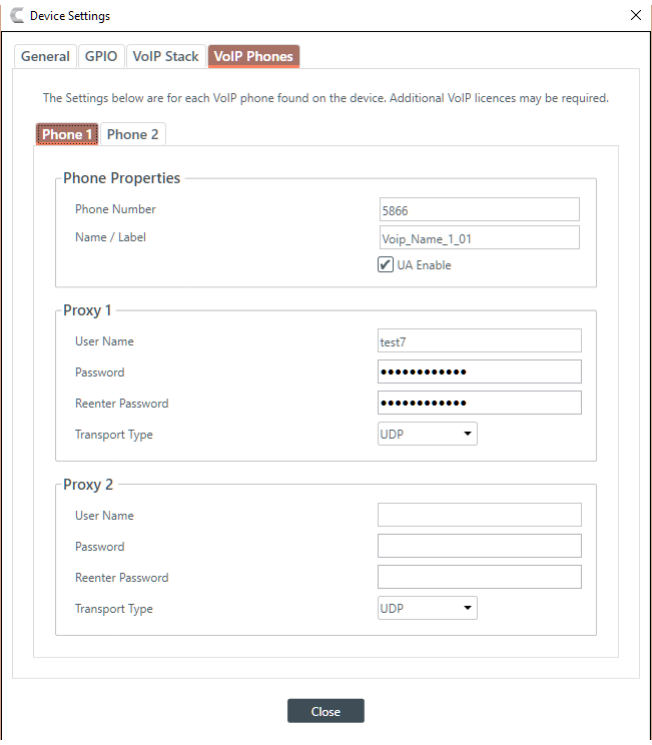
4. Enter the primary extension (Directory Number) from UCM in the Phone Number field.
5. Enter the Digest Credentials from UCM in the Proxy 1 User Name and Password fields.
6. If you’re using two lines, click the Phone 2 tab and repeat steps 4 and 5 for the second line.
7. Click the VoIP Stack tab.
The VoIP Stack dialog box appears:
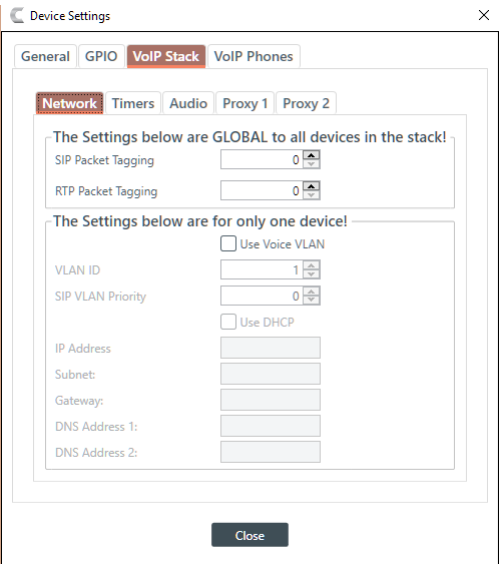
8. Click the Proxy 1 tab.
The Proxy 1 dialog box appears:

9. Type the domain and IP address of the proxy you are going to register to in the User Domain and Registrar Address fields.
10. Click the Audio tab.
The Audio dialog box appears:
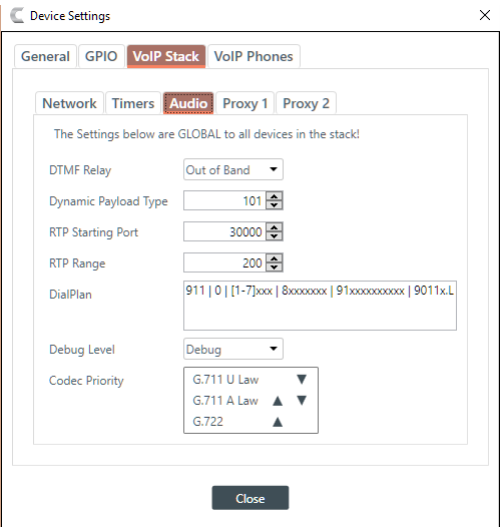
11. Set the DialPlan to match the calling requirements for your UCM configuration. Consult the CONVERGE Pro 2 CONSOLE User Manual for more details about dialplans.
12. Click Close.
13. Save the project and then load it to the CP2 device (see the CONVERGE Pro 2 CONSOLE User Manual).
NOTE: To help you gather information about the required VoIP settings, you can use the CONVERGE Pro 2 VoIP/SIP Worksheet in the ClearOne Resource Library at this address: https://www.clearone.com/sites/default/files/2019-05/CP2%20VoIP%20SIP%20Worksheet.pdf